


Gmail is one of the most widely used email services globally, and it’s packed with features designed to help you stay organized. However, managing a cluttered inbox can still be challenging, especially if you receive a large volume of emails daily. One of the best ways to maintain order in your inbox is by using Gmail’s folders and labels. These tools allow you to categorize, prioritize, and easily locate your emails.
In this guide, we’ll walk you through the process of creating folders and labels in Gmail, and show you how to use them effectively to keep your inbox organized.
Understanding Folders and Labels in Gmail
Before diving into the steps, it’s important to clarify the difference between folders and labels in Gmail. Unlike traditional email clients that use folders, Gmail uses labels. Labels are more versatile than folders because a single email can have multiple labels, allowing you to categorize it in different ways without duplication. However, you can still create a folder-like structure using labels and sub-labels.
Step 1: Creating a New Label
Creating a new label in Gmail is a straightforward process. Here’s how you can do it:
- Open Gmail: Go to mail.google.com and log in to your account if you haven’t already.
- Access the Sidebar: On the left side of the screen, you’ll see a menu that includes sections like Inbox, Sent, Drafts, etc. Scroll down to the bottom of this menu until you find the “More” option. Click on “More” to expand the menu.
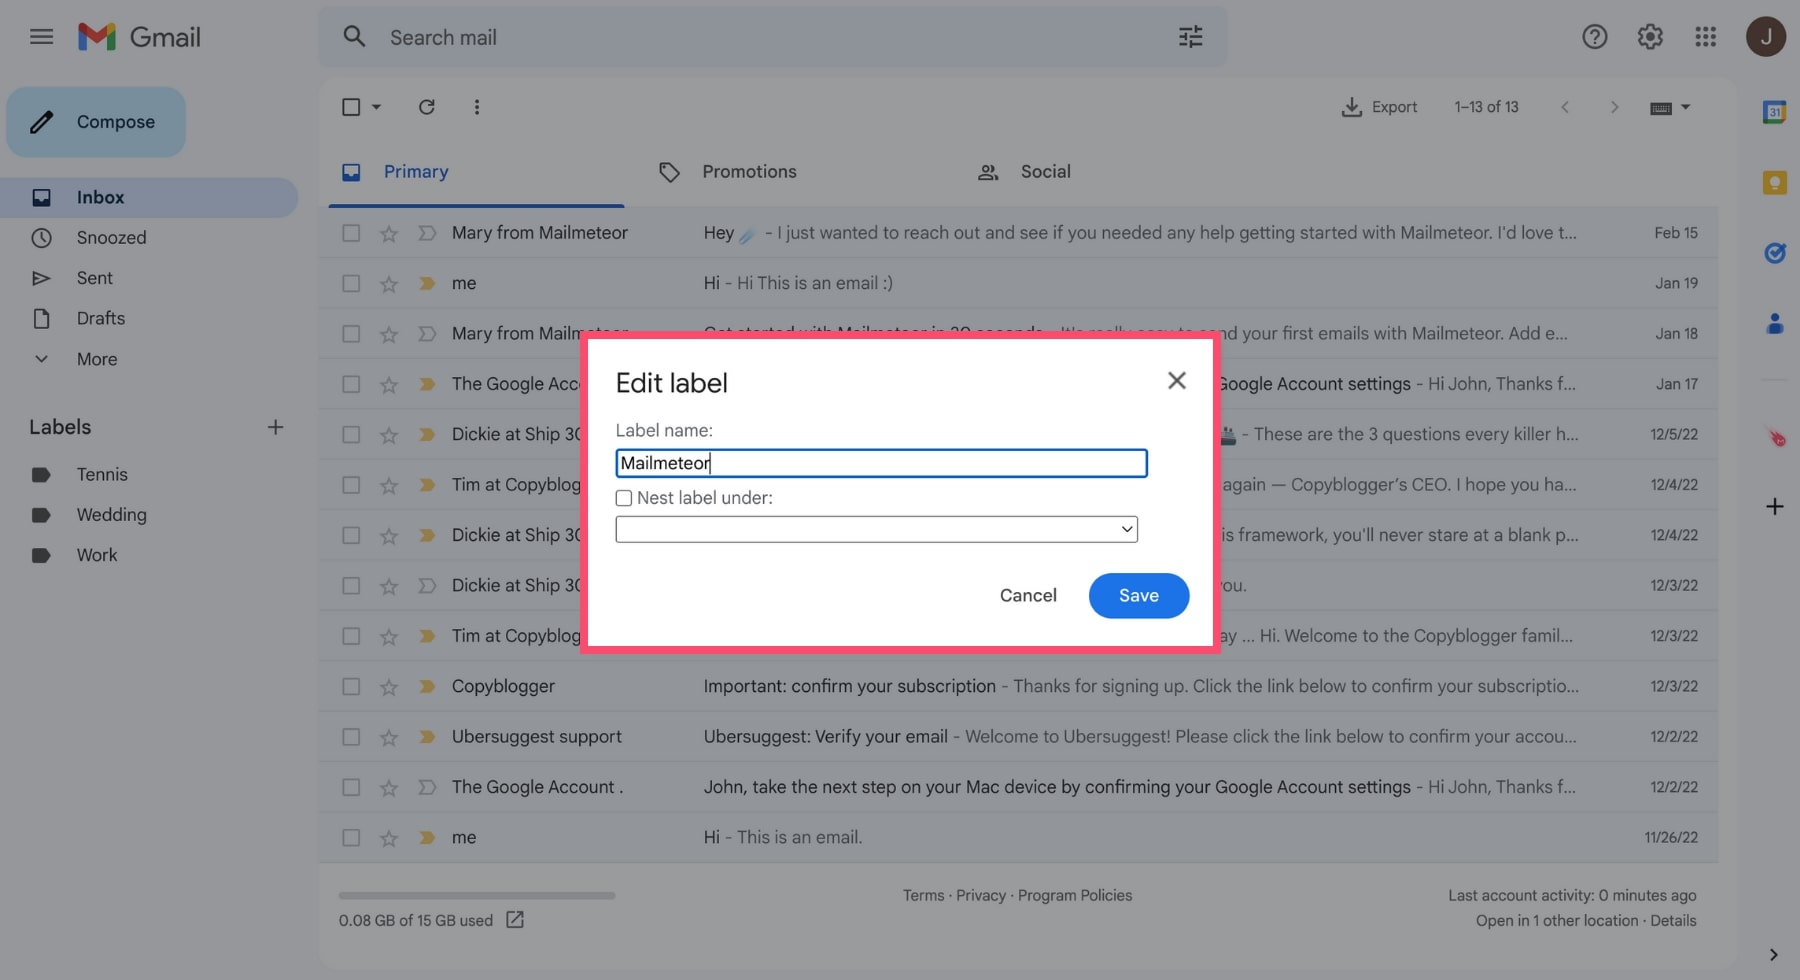
- Create a New Label: Scroll down further, and you’ll see the option “Create new label.” Click on it to open a new window where you can name your label.
- Name Your Label: Enter a name for your label. This name should be descriptive enough to remind you what type of emails will be filed under it (e.g., “Work,” “Personal,” “Travel,” etc.).
- Nest Label Under a Parent Label (Optional): If you want to create a sub-label (which functions like a subfolder), check the box labeled “Nest label under” and select the parent label from the dropdown menu. For instance, you might have a parent label called “Work” and sub-labels called “Projects” or “Meetings.”
- Create the Label: Once you’ve named your label and chosen whether to nest it, click “Create.” Your new label will now appear in the sidebar.

Step 2: Applying Labels to Emails
Now that you’ve created your labels, the next step is to start organizing your emails. Here’s how to apply labels to your emails:
- Select Emails: Go to your inbox and select the emails you want to label. You can do this by checking the small box to the left of each email.
- Apply the Label: After selecting your emails, click on the “Label” icon (which looks like a small tag) located above your email list. A dropdown menu will appear with all your labels listed.
- Choose Your Label: Select the label(s) you want to apply to the emails. You can select more than one label if necessary.
- Label and Move: After applying the label, you can also move the email to the label by clicking on the “Move to” icon (which looks like a folder). Select the label to move the email to the associated label’s section.
- View Labeled Emails: To view emails under a specific label, simply click on the label name in the sidebar. This will filter your inbox to show only the emails associated with that label.
Step 3: Managing Labels
Over time, you might need to edit, rename, or delete labels. Gmail makes this easy to manage.
- Edit or Delete Labels: In the left sidebar, hover over the label you want to edit or delete. Click on the three vertical dots that appear next to the label name. This will open a menu with options to “Rename,” “Remove label,” “Add color,” or “Edit.”
- Adding Colors: Adding a color to your labels can help you visually distinguish different categories. Simply select “Label color” from the menu and choose the color that best suits your needs.
- Organizing Labels: If you find that you have too many labels, consider nesting some of them under a parent label to keep the sidebar tidy.

Step 4: Automating Labeling with Filters
Gmail allows you to automate the labeling process using filters. Filters automatically apply labels to incoming emails based on criteria you set, such as the sender, subject, or keywords.
- Create a Filter: To create a filter, click on the settings gear icon in the upper-right corner of Gmail and select “See all settings.”
- Navigate to Filters and Blocked Addresses: In the settings menu, go to the “Filters and Blocked Addresses” tab and click on “Create a new filter.”
- Set Filter Criteria: Define the criteria for the filter (e.g., emails from a specific sender, emails containing certain words, etc.). Once you’ve set your criteria, click on “Create filter.”
- Apply a Label with the Filter: In the next screen, select “Apply the label” and choose the label you want to assign to emails that match the filter criteria.
- Save the Filter: Click “Create filter” to save your settings. Now, any incoming email that matches the criteria will automatically be labeled.
Also Read: How to See Who Screenshotted Your Snapchat Story
Conclusion
Using Gmail’s labels effectively can transform your email experience by keeping your inbox organized and easy to navigate. Whether you’re managing personal emails, business correspondence, or specific projects, labels give you the flexibility to categorize and find your emails quickly. By creating, applying, and managing labels—and even automating them with filters—you can stay on top of your inbox and ensure nothing important slips through the cracks.
Start organizing your inbox today with these simple steps, and experience the difference that a well-structured email system can make in your productivity and peace of mind.